Some of the links on this page contain affiliate links. Renaissance Path is a participant in the Amazon Associates Program, an affiliate advertising program that provides a way for websites to earn advertising fees by linking to products. We only link to products we normally use and trust. When you purchase an item through the link we receive a small commission at no additional cost to you. This helps pay for the costs associated with running this blog. Your support is greatly appreciated. Thank You!
Mosaic Rock Tutorial
Pick Your Rock
When picking a rock for your mosaic you need to decide what size you want it to be. The smaller the rock the more difficult your mosaic will be. If it’s super small and you decide to make a frog or something like that it means parts like its legs are going to be super tiny and it can be difficult to cut or nip glass that small. Especially for a beginner.
I feel like the right size rock is about the size of two fists or a fist in a half. You want your rock to have a flat or semi-flat surface on it or be slightly rounded. If your rock has too many bumps and crevasses it will be too hard to mosaic.
I recommend going with a darker colored rock, try to stay away from granite too. I have used granite rocks and I feel like it takes away from the mosaic. Also try to avoid white rocks unless you plan on using white grout.
I have done mosaics on white rocks and it’s really hard to get them really clean. They always seem to look dirty to me. But use your best judgment if you find one that looks great then by all means go for it.
Once you picked out the rock you’re going to mosaic you need to give it a good cleaning with some dish soap and water. I used regular old Dawn dish soap and an old toothbrush. Let it dry fully before the next step.
Make Your Design
Once your rock is dry you can draw a design on your rock. You can trace something you find online and transfer it to your rock. You can just freehand also. I have made patterns and traced those and I have also used stencils and traced those.
When you are trying to decide what to draw. Start with something simple like a fish or a heart or a bird. You want something that doesn’t have too much detail.
My advice is keep it simple.
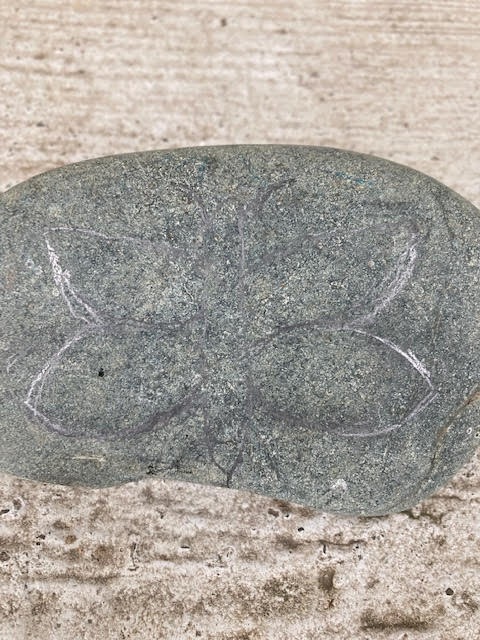
Decide what color scheme you want, what color grout you’re going to use. You want to make sure you use colors that complement each other.
Supplies
Make sure you have all the supplies you need. Nothing is more frustrating than getting all excited to do a project and you begin doing it and realize you don’t have the right tools or materials to finish your project. This happened to me today. I couldn’t find my usual mosaic adhesive and I didn’t have enough beads to finish the border of my project. I got 80% done. And now I have to go to the store tomorrow to get the supplies I need to finish.
I don’t have a craft room or specified space to do my crafts and art. They get done at my kitchen table so I have to pull all my supplies out which takes a little bit of time to set up and also to put away. But its definitely worth it. I have to be able to be creative. I need that creative outlet.
Supplies You Need


Cut Your Glass or Tile
If you are using small tiles you can use glass/tile nippers to cut them up into smaller pieces. Here is a link to a YouTube video on how to use nippers. Cutting Glass Mosaic Tile With Nippers.
If you have a sheet of stained glass you will need to use the glass cutter pen to cut off a section. Once you cut off a section or strip of stained glass you can nip the glass into smaller pieces. You will need to apply the right amount of pressure to the glass when cutting.
You’ll know you pressed too hard if you see shards of glass in your scored line. It takes practice to learn the proper amount of pressure.
Here is a YouTube on how to use a glass cutter pen and also how to use running pliers. How to Cut Glass – Beginner Tips and Tricks
Glueing the Mosaics on the Rock
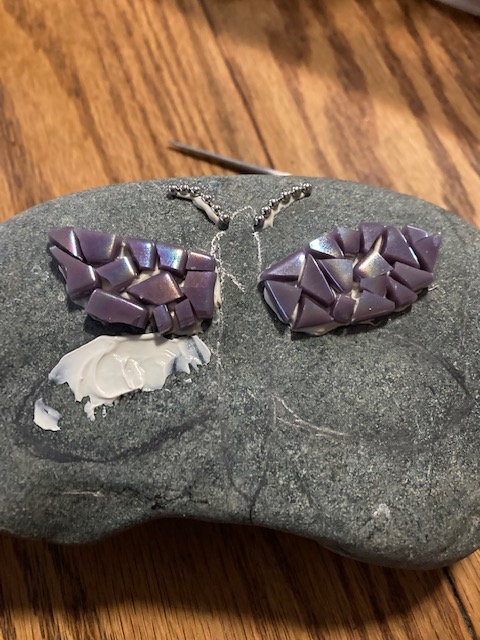
I like to apply adhesive/glue directly on the rock and then place my glass or tiles on top of that. Make sure not to overuse the glue. Some glue dries clear and some don’t and if you use too much sometimes the grout doesn’t fully cover it and you’ll see glue peaking through when it dries.
Apply Border Beads Around Design
I like to use beads or metal chain around my design. I find it really makes the mosaic pop. I like to use crystal or glass beads so when the light hits them they really sparkle.
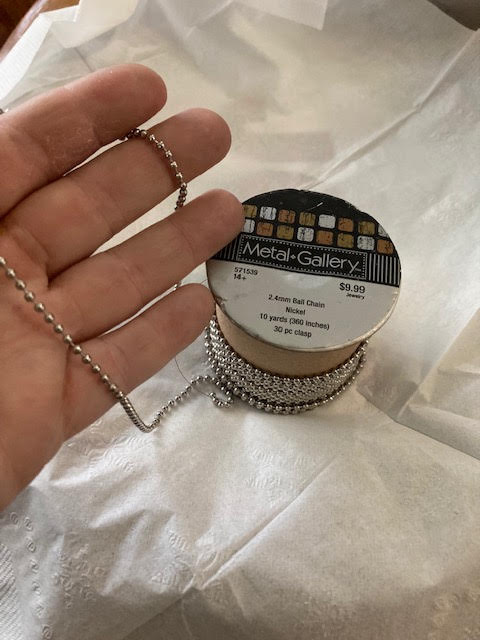
This metal chain pictured can be purchased at most craft stores like Michaels or Hobby Lobby.
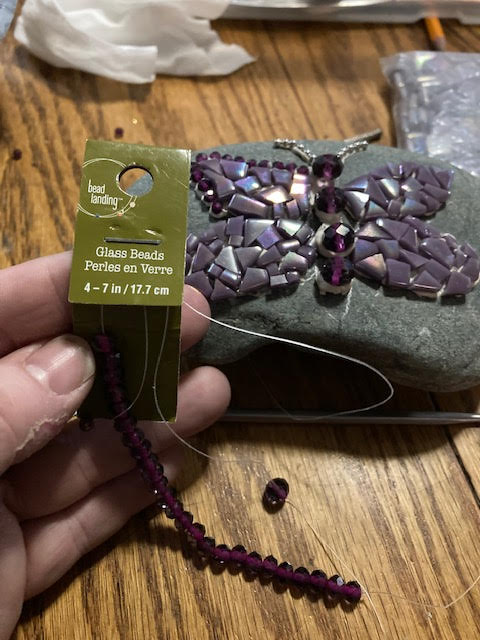
I used these glass beads pictured above. I bought these at Michaels but you can purchase them online from just about anywhere.
To apply the beads I put a small line of glue around the edge of the mosaic. Again don’t apply too much, just the right amount to hold the bead in place. The glue should NOT be covering the whole bead, just the bottom half.
Drying
You need to let the glue dry for 24hrs before you grout. You should double-check the mosaic making sure everything is still holding in place. Turn it upside down, make sure no pieces fall off.
After it has been 24hrs you can tape around your mosaic design. You can use blue painter’s tape or plain masking tape. This helps so you don’t get grout all over the rock. Grouting can be a messy thing.
Grouting
Mix grout and water according to manufacturer directions. The grout mixture should be a thick peanut butter consistency. It’s best to wear gloves. Apply grout mixture on top of the mosaic using your fingers and hands to gently work into all the cracks in between the beads and tiles. Be careful as you are working with glass and it is sharp. You can cut yourself if you work too fast. Ask me how I know.
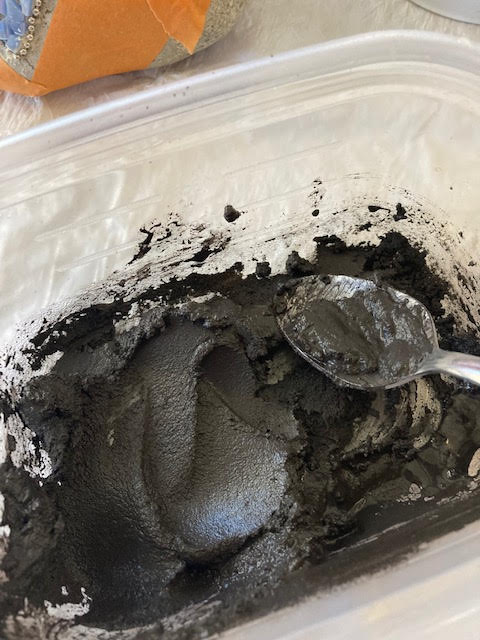
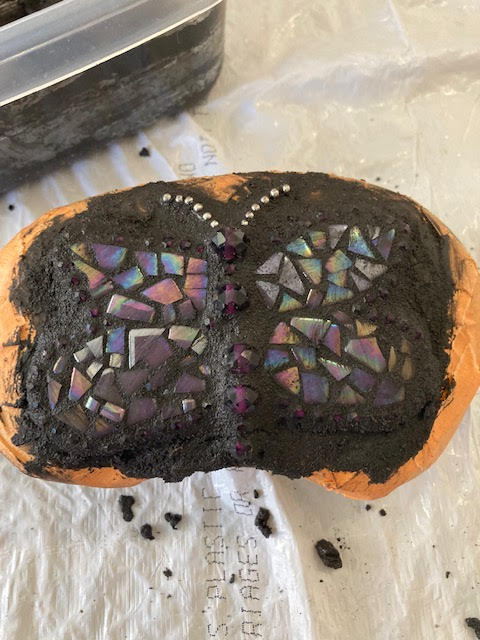
Once you finished grouting you can start wiping off the excess grout. You can use a damp sponge with a bucket of water or you can use a lint-free cloth to wipe away excess grout.
If you are using a sponge you want to make sure to squeeze all the excess water out before using it to wipe excess grout away. And you need to frequently rinse the sponge in your bucket of water otherwise you will just keep pushing grout around. Your goal is to wipe away grout. Your sponge will grab excess grout and then you rinse the sponge out and squeeze all the excess water so the sponge is damp and just keep repeating.
I rarely use the sponge method to clean off my mosaics now. I like using lint-free cloths to wipe away the grout. Old cotton scrap t-shirts work great.
The grout I use I will link in the supplies section of this post. But you can use any color of sanded grout. I just prefer black.
Allow 24 hours for the grout to dry before you move on to the next step.
Clear Coat
After 24 hours the mosaic rock should be dry and you can put a coat of polyurethane on it. I like to use a spray-on. This helps protect the mosaic from the elements and makes it even shinier.
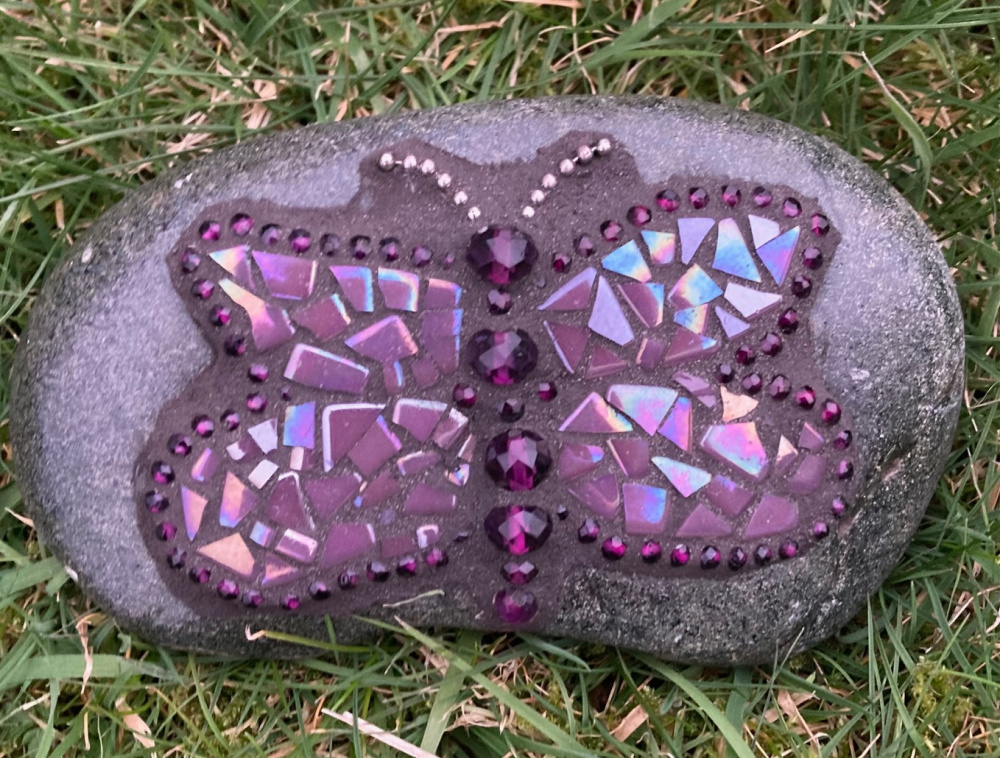
After 24 hrs it’s finished and ready to go outside in the garden. It also makes a beautiful paperweight.

I hope you enjoyed this tutorial. Please let me know if you have any questions, you can leave me a comment below. If you make a mosaic rock I’d love to see pictures of the finished projects.
Thank You!
Much Love,
Melissa
If you like DIY crafts and projects check out this post here.
I’m new to mosaics and I’ve experimented with many types of adhesives. I’ve not tried liquid nails. So far, E6000 and Goop glue works best for me. I’ve not tried sealing my rocks with Varathane only ordinary grout sealer. I live where there is extreme heat, will the Varathane crack, peel, and yellow over time?
Thank you for the clear step by step instructions. New at it and never happy with the final product. Your instructions will help. ThNks again